


Caddy is an open-source web server built with the Go programming language, known for its ability to automatically issue free SSL certificates from Let’s Encrypt. If you’re looking for a simple and efficient solution to deploy your website on an Ubuntu VPS, Caddy is definitely a worthwhile option to consider. In this article, VPSWindows will provide you with a detailed, easy-to-follow guide on how to install Caddy on Ubuntu VPS.
What is Caddy and Why use it?
Caddy is an open-source web server written in the Go programming language. It is designed with the philosophy that “simplicity is best”, focusing on automating complex tasks that traditional web servers like Nginx or Apache typically require manual configuration for.

Top Benefits of Using Caddy:
- Automatic HTTPS: Caddy automatically issues and renews free SSL certificates from Let’s Encrypt, securing your website’s traffic without requiring any manual effort from the user.
- Simple Configuration: Thanks to its clean and human-readable Caddyfile syntax, configuring a web server becomes fast and error-free, minimizing risks from misconfiguration.
- High Performance: Built with the Go programming language, Caddy delivers impressive performance, especially when handling high-concurrency connections and large-scale web traffic.
- Easy Extensibility: Caddy supports a wide range of plugins and modules, allowing users to easily extend functionality and customize their web server to meet specific needs.
System Requirements and Preparation Before Installation
Before installing Caddy on your Ubuntu VPS, make sure your system meets the basic requirements. These prerequisites will help ensure a smooth and efficient installation process.
SSH Access to Your VPS
ssh username@your_vps_ipSudo Privileges or Root Access
Having sudo privileges or root access is essential when you install Caddy on Ubuntu VPS. This allows you to execute commands that require elevated permissions to modify system configurations or install software.
Your Domain Must Point to Your VPS IP Address
Open Ports 80 (HTTP) and 443 (HTTPS) on the Firewall
- Open port 80 for HTTP:
sudo ufw allow 80/tcp - Open port 443 for HTTPS:
sudo ufw allow 443/tcp - If UFW is not yet enabled:
sudo ufw enable - Check firewall status:
sudo ufw status
How to install Caddy on Ubuntu VPS
Update the System
sudo apt update && sudo apt upgrade -y
Install Required Packages
sudo apt install -y debian-keyring debian-archive-keyring apt-transport-https curl gnupg- debian-keyring, debian-archive-keyring, and apt-transport-https: Allow your system to securely trust and communicate with HTTPS-based repositories.
- curl: A command-line tool used to download Caddy’s GPG key.
Add the Official Caddy Repository
curl -1sLf ‘https://dl.cloudsmith.io/public/caddy/stable/gpg.key’ | sudo gpg –dearmor -o /usr/share/keyrings/caddy-stable-archive-keyring.gpgcurl -1sLf 'https://dl.cloudsmith.io/public/caddy/stable/debian.deb.txt' | sudo tee /etc/apt/s.list.d/caddy-stable.listInstall Caddy
sudo apt updatesudo apt install caddy -yVerify the Installation
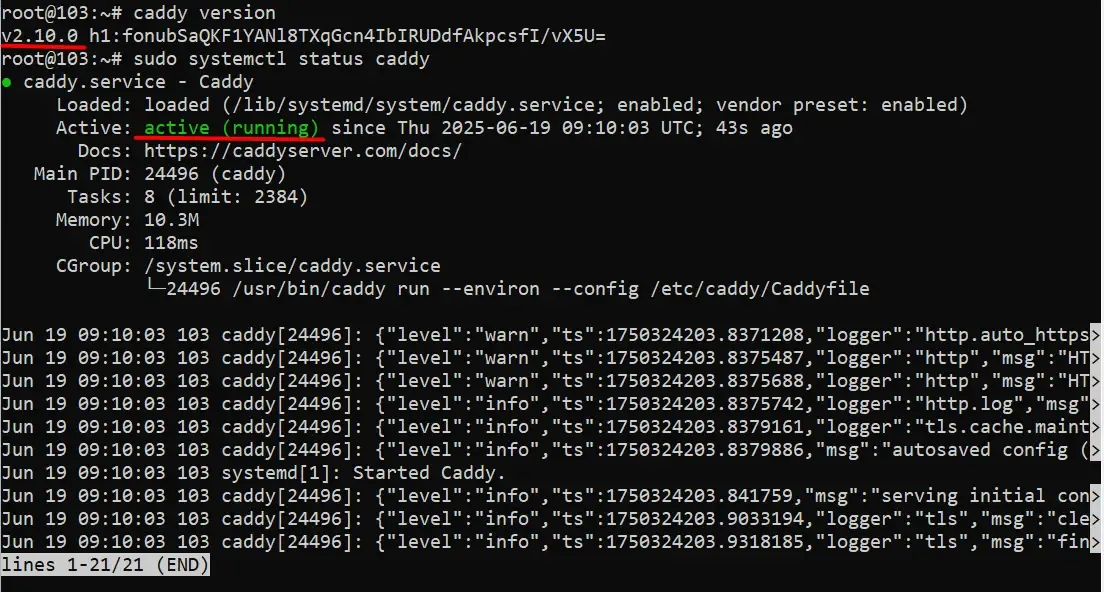
Check Caddy Version:
caddy versionsudo systemctl status caddyConfigure Your First Website with Caddy
example.com {root * /var/www/htmlfile_server}sudo mkdir -p /var/www/htmlecho “Hello from Caddy!” | sudo tee /var/www/html/index.htmlsudo systemctl reload caddy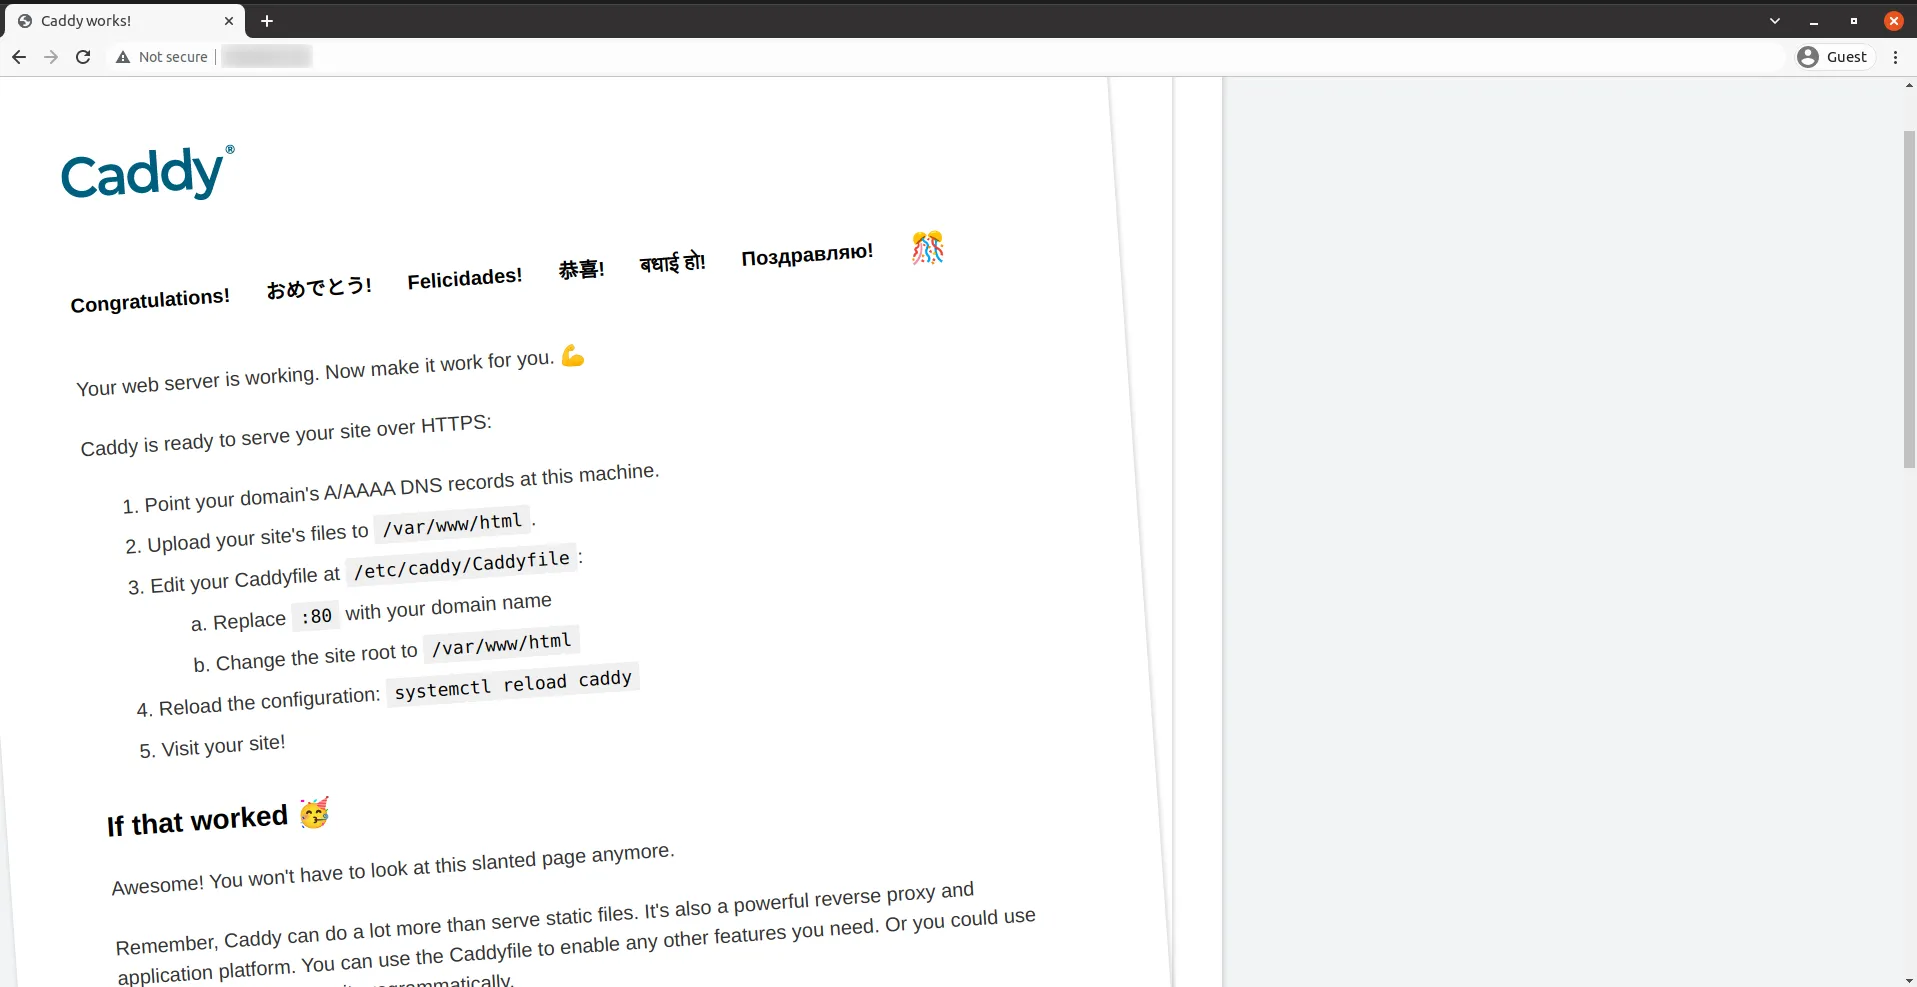
Comparison of Caddy and Nginx on Ubuntu VPS
The following comparison table will help you clearly understand the differences and see why Caddy is becoming a popular choice for many users.
| Criteria | Caddy | Nginx |
| Automatic SSL Configuration | Yes, free via Let’s Encrypt | Manual configuration required (eg, with Certbot) |
| HTTP/3 | Enabled by default | Requires manual compilation |
| Configuration File | Very simple (Caddyfile) | More complex (nginx.conf) |
| Setup Speed | Faster and easier | Takes more time |
| Performance | High. handles concurrency well | Very high, optimized for large-scale traffic |
| Scalability | Easy with reverse proxy and load balancing | Very flexible, supports many modules |
| Popularity | Rapidly growing | Widely used, large community |