When managing a Windows VPS (Virtual Private Server), one of the most important tasks is learning how to access it remotely. The most common and efficient way to log into your Windows VPS is through Remote Desktop Connection (RDC). This built-in Windows feature enables users to access their VPS from any location and device. In this comprehensive guide, we’ll provide step-by-step instructions on how to log into your Windows VPS using Remote Desktop Connection.
What Is a Windows VPS?
A Windows VPS is a virtualized server that runs a dedicated Windows operating system. Unlike a shared hosting environment, where multiple users share resources, a VPS provides users with dedicated resources such as CPU, RAM, and storage. This gives you greater control, reliability, and scalability for running applications, hosting websites, or managing remote services.
Windows VPS environments are ideal for businesses, developers, and IT administrators who need to run specialized applications or manage server environments remotely. By using RDC, you can access your Windows VPS from any device with an internet connection, making it an essential tool for VPS management.
Why Use Remote Desktop Connection?
Remote Desktop Connection (RDC) is a powerful built-in Windows tool that allows users to control and manage their Windows VPS from virtually anywhere. RDC provides a user-friendly interface that mimics the experience of sitting directly in front of the VPS. It is highly secure and convenient for accessing remote servers, managing tasks, and troubleshooting issues.
Some of the key reasons to use RDC for accessing your Windows VPS include:
- Remote Access: Log into your VPS from any location.
- Full Control: Complete administrative control of your server as if you’re using it locally.
- Easy File Transfer: Seamlessly transfer files between your local device and the VPS.
- Secure Access: Built-in encryption and security protocols to safeguard your remote connections.
Prerequisites for Using RDC to Access a Windows VPS
Before you can log into your Windows VPS using Remote Desktop Connection, you’ll need the following:
- VPS Credentials: You need the IP address of your VPS, along with the username and password provided by your hosting provider.
- Remote Desktop Connection Software: This software is pre-installed on Windows devices. If you’re using macOS, Linux, or another operating system, you can download the Microsoft Remote Desktop app from the respective app stores.
- Stable Internet Connection: A reliable connection ensures smooth and uninterrupted access to your VPS.
- Remote Desktop Enabled on VPS: Ensure that Remote Desktop is enabled on your Windows VPS.
Logging into Your Windows VPS Using Remote Desktop Connection
Windows VPS provides us with a user-friendly that can be used on both computers and phones, below is a guide to logging in to VPS on your computer.
First of all, we must have a VPS with Windows operating system installed, and if you don’t have one yet, please visit VPSWindows homepage to rent a cheap VPS that best suits your needs.
Step 1: Retrieve VPS Credentials
After you have purchased the VPS, the seller will provide you with the following information to access and use it, including IP, username and password, for example:
IP: 123.123.12.11
Username: Administrator
Password: Test@1234
If you haven’t received these details, contact your VPS provider.
To access the VPS through that information, you can use the software available on the Windows computer called “Remote Desktop Connection”.
Step 2. Open the Remote Desktop Connection application
Click on Start (Windows menu), type “Remote Desktop Connection” in the search bar, open the “Remote Desktop Connection” application, a dialog box will appear as follows:
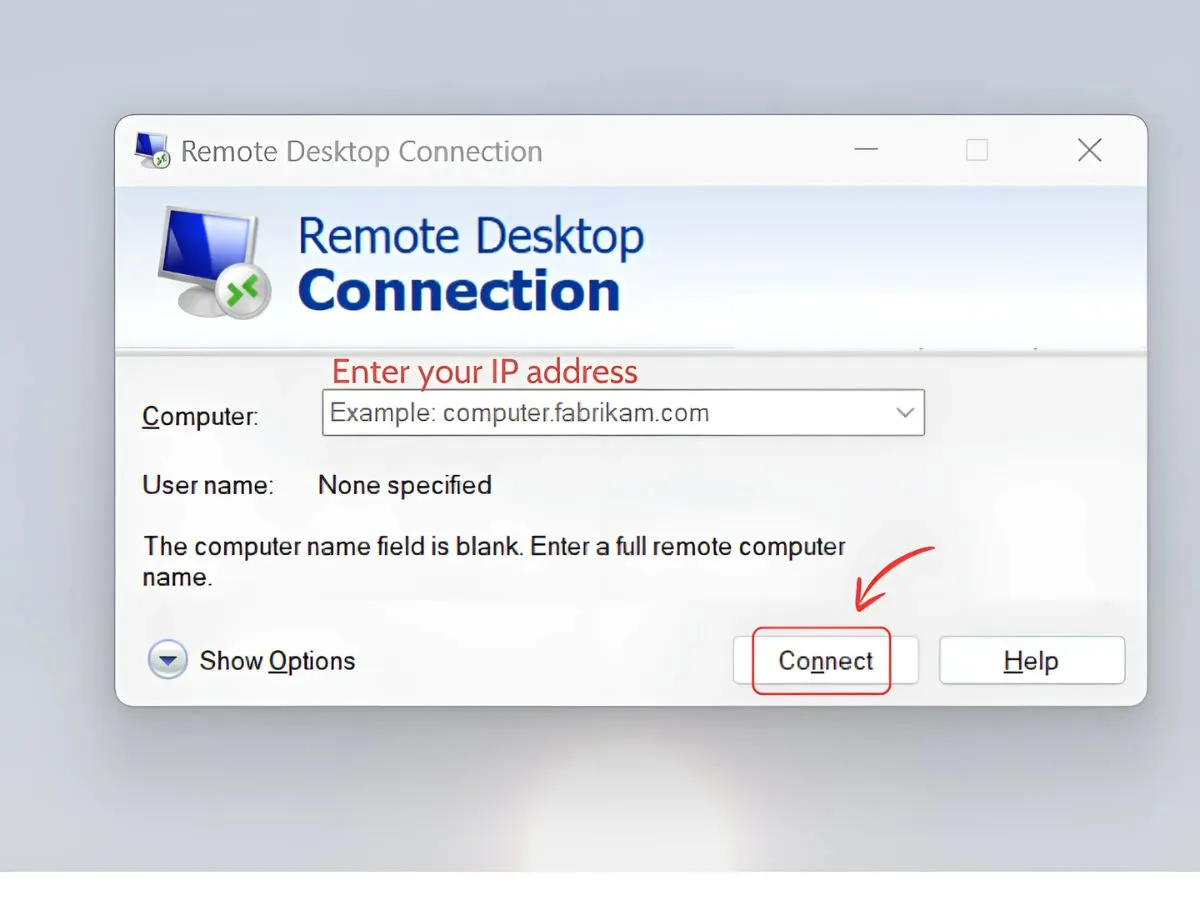
In the RDC window, you’ll see a field labeled Computer. Here, enter the IP address of your Windows VPS. This address tells the Remote Desktop software where to find and connect to your server.
Step 2. Enter IP, Username, Password into the Remote Desktop Connection application
After entering the IP address and clicking Connect, a login prompt will appear. Enter the username and password provided by your hosting provider. The default username is often “Administrator.”
If you want to avoid typing the password every time, you can check the option Remember me. However, make sure you’re using a secure device before enabling this option.
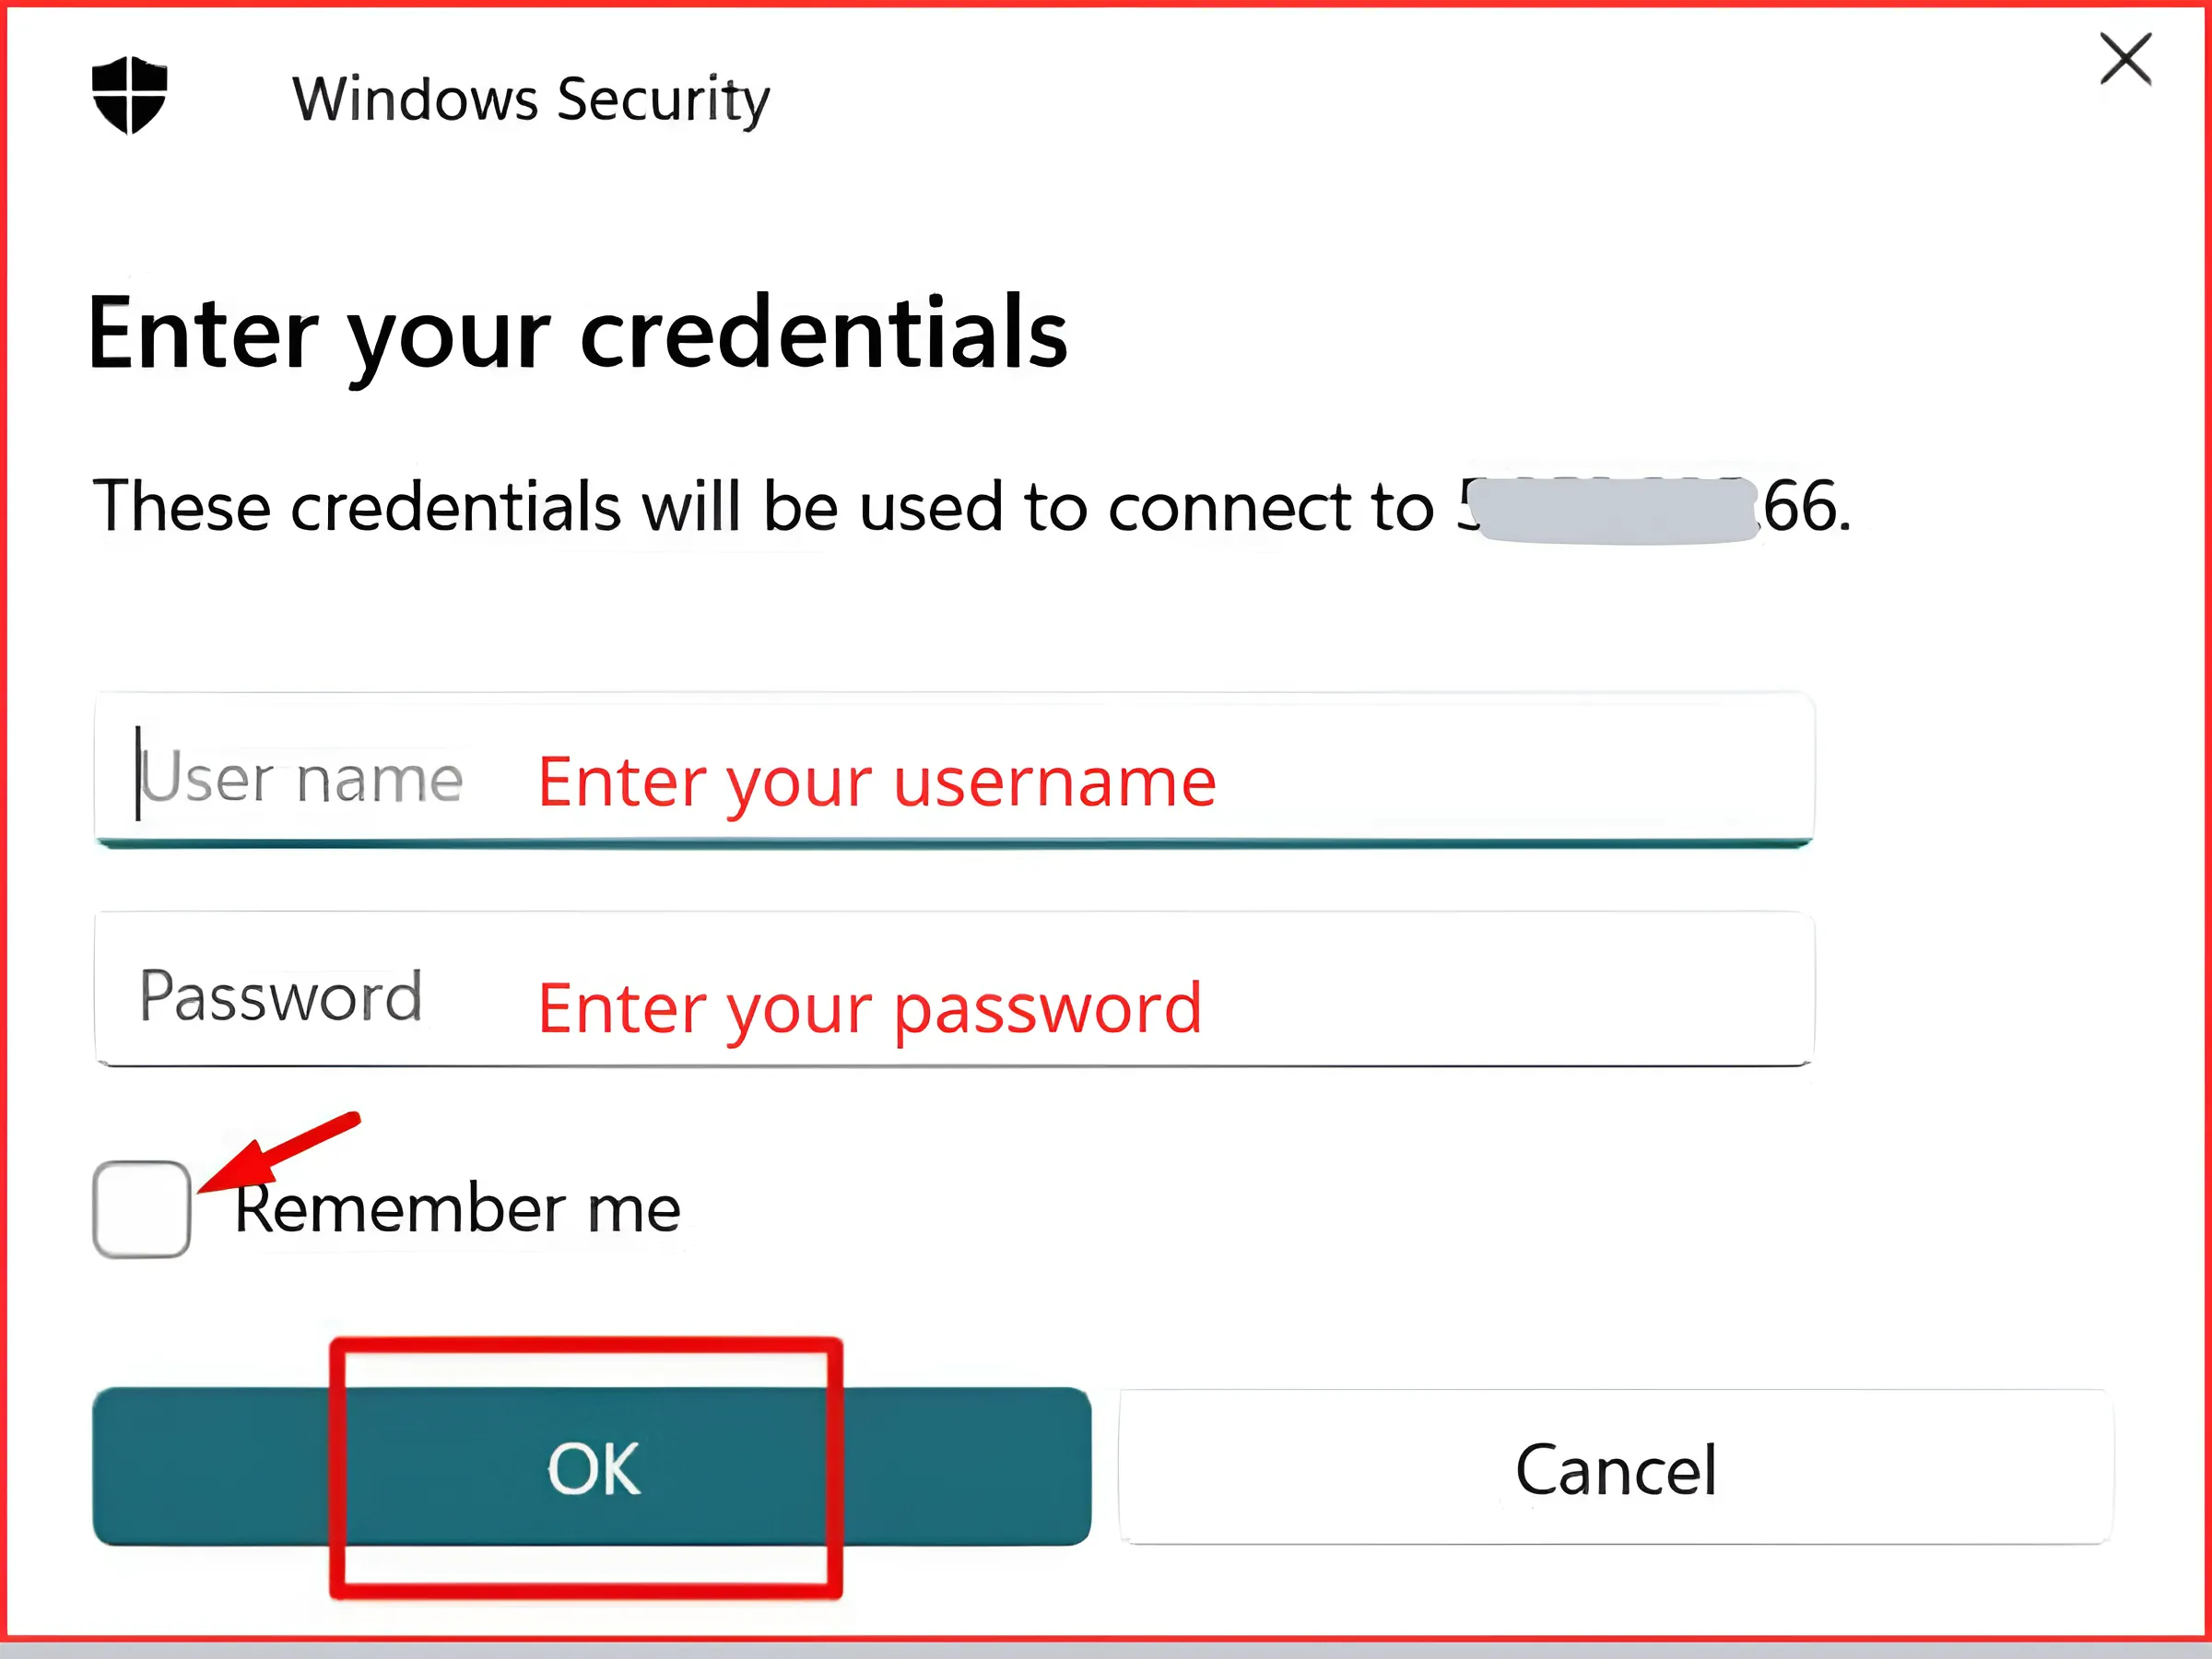
After you have entered the password and continue to press => OK
Step 3. Confirm security to log into VPS
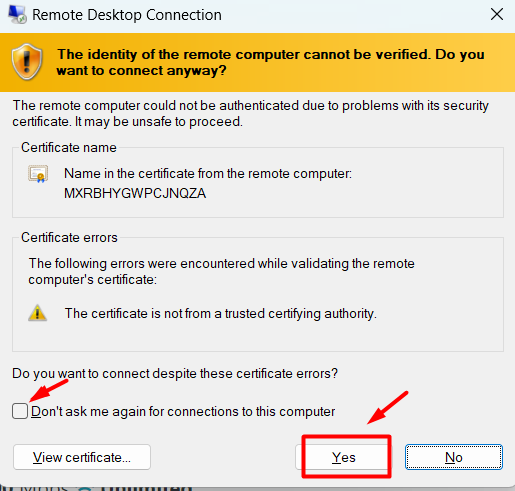
RDC may display a warning that the identity of the remote computer can’t be verified. This occurs because the VPS doesn’t have an SSL certificate installed for the connection. You can safely ignore this warning and check the box Don’t ask me again for connections to this computer, then click Yes to proceed.
After successfully log in to a VPS Windows in, the VPS interface will look like the image below, and that means your Windows VPS is ready to use. Here you can use the VPS just like a regular computer.
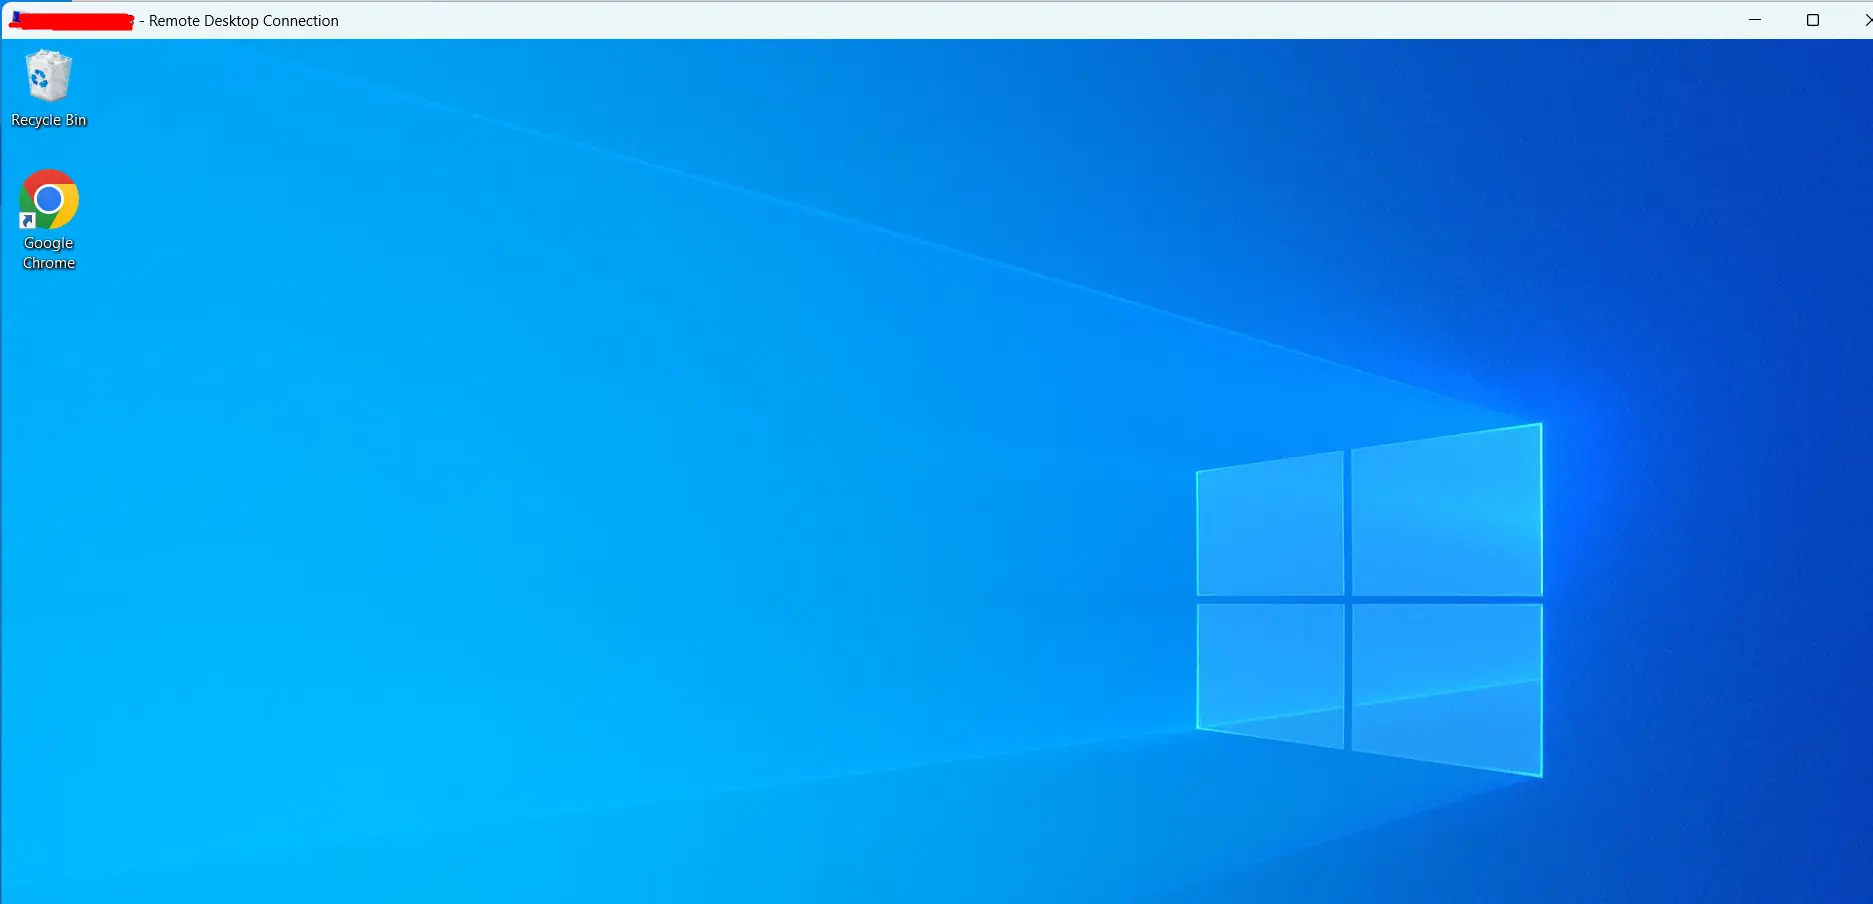
With the three steps above, you can successfully log into your VPS. After accessing the VPS, you should change the VPS password to secure your VPS service best.
Conclusion
Logging into your Windows VPS using Remote Desktop Connection is an essential skill for anyone managing a VPS. By following these steps, you can securely access your server from anywhere and perform a wide range of administrative tasks. Remote Desktop offers a reliable, efficient, and secure way to interact with your Windows VPS, making server management convenient and seamless.
Thank you for following the blog of VPSWindows.com. We strive to provide you with useful knowledge about Windows and Linux VPS management, helping you make the most of your hosting services. For more tutorials and tips, be sure to check back often!


