


Are you using a VPS running Ubuntu 22.04 and want to turn it into a web server? Apache is a great choice for that! In this guide, VPSWindows will walk you through each step to install Apache on Ubuntu 22.04 VPS in the simplest, most beginner-friendly, and optimized way possible.
What is Apache?
Apache (full name: Apache HTTP Server) is an open-source web server software, developed and maintained by the Apache Software Foundation. It is one of the most popular web servers in the world, serving millions of websites, from personal blogs to enterprise systems.
Apache works by receiving requests from the user’s browser and responding with web content such as HTML, images, videos, or dynamic web applications using PHP, Python, etc. Additionally, it can handle both static and dynamic websites, and supports many features such as SSL, virtual hosts, URL rewriting, and many other extension modules.

Why Install Apache on Ubuntu 22.04 VPS?
As mentioned earlier, Apache is one of the most widely used web servers, offering a range of benefits. Here are some compelling reasons why you should install Apache on Ubuntu 22.04 VPS:
Popular and Easy to Use: Apache is not only popular but also very beginner-friendly. Whether you’re a complete novice or have some experience, it’s easy to get started with. Thanks to the vast amount of documentation and tutorials available online, you can quickly find solutions to any problems you might encounter. Apache also features a clear and flexible configuration system, allowing you to easily update and customize settings to suit your needs.
Stable Performance and High Flexibility: Apache stands out for its ability to handle high traffic while maintaining stable performance, a crucial factor if you plan to host a high-traffic website or a dynamic web application. Furthermore, it offers a high degree of flexibility through various modules and plugins, giving you full control over how your web server operates.
Great Support for Both Static and Dynamic Websites: One of Apache’s biggest strengths is its ability to serve both static and dynamic websites. Whether you’re building a simple personal blog or a complex web application, Apache can handle it. It integrates smoothly with popular technologies like MySQL/MariaDB and PHP. If you’re planning to run a CMS like WordPress, Joomla, or Drupal, Apache is an excellent choice.
Security and Safety You Can Trust: Security is a top priority for Apache. With strong built-in features like SSL/TLS support, user authentication, and directory protection, your data stays safe. Additionally, Apache allows for easy integration with third-party security tools, giving you even more control and flexibility when securing your web server.
How to Install Apache on Ubuntu 22.04 VPS
If you’re ready, open your Terminal or SSH client and log in to your Ubuntu VPS. We’ll walk through each step to install Apache on Ubuntu 22.04 VPS together.
Step 1: Update the System
Before installing anything, it’s a good idea to update your system. This ensures you’re installing Apache from the latest and most secure sources. To do this, open your terminal and run the following command:
sudo apt update && sudo apt upgrade -yThis command updates the package list and upgrades all installed packages, keeping your system up to date. The process usually takes just a few minutes, depending on your internet speed.
Step 2: Install Apache
Once your system is updated, you can proceed to install Apache on Ubuntu 22.04 VPS by running the following command:
sudo apt install apache2 -yThis command will automatically download and install Apache on your server. Once the installation is complete, you’ll receive a confirmation message, and Apache will be successfully installed.

Step 3: Verify Apache is Running
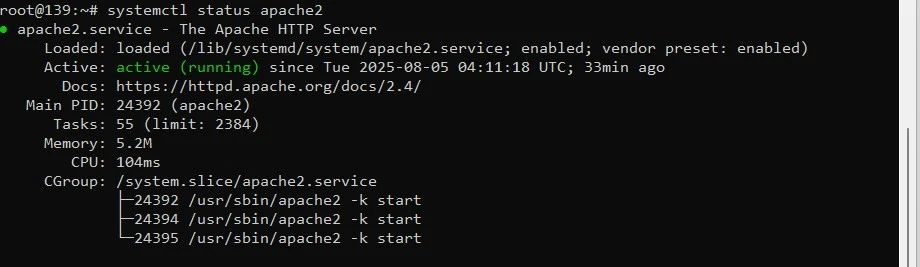
To make sure Apache is working properly, you should check its status. Use the following command in the terminal:
systemctl status apache2
If Apache is running, you will see the message “active (running)”.
You can also open your server’s IP address in a web browser to view the Apache default welcome page, which confirms that the installation was successful.
Step 4: Check in the Browser
Open your web browser and visit your VPS’s public IP address:
http://Your-VPS-IP-AddressIf you see a welcome page titled “Apache2 Default Page”, it means Apache is running properly.

Step 5: Configure the Firewall (If Using UFW)
If you’re using UFW (Uncomplicated Firewall) to manage your firewall, you’ll need to allow Apache traffic. Run the following command:
sudo ufw allow 'Apache Full'This command opens both port 80 (HTTP) and port 443 (HTTPS) for Apache.
You can also check the status of UFW to ensure the rule has been applied successfully:
sudo ufw statusBasic Apache Configuration
With Apache successfully installed, the next step is to configure it according to your needs. Below are some basic configurations you can perform.
Determine the website’s root directory
The website’s root directory is where all the documents and files you want to serve on the server are stored. By default, Apache sets the root directory at
/var/www/html.All your website files (HTML, CSS, JS, images,…) must be placed in this directory. If you open this folder, you will see the index.html file of the default page you just accessed.
You can edit this index.html file to test:
sudo nano /var/www/html/index.htmlThen save and access the VPS IP again, you will see the content has changed.
Apache’s Main Configuration Files
To work efficiently with Apache, you need to know where the important configuration files are located. All Apache configurations on Ubuntu 22.04 are stored in the
/etc/apache2 directory./etc/apache2/apache2.conf: This is the global configuration file for Apache. Any settings in this file apply to all your websites unless overridden by individual configurations./etc/apache2/ports.conf: This file defines which ports Apache will listen on. The default ports are 80 (HTTP) and 443 (HTTPS)./etc/apache2/sites-available/: This directory contains configuration files for each website (Virtual Host) you have./etc/apache2/sites-enabled/: This directory contains symbolic links to the configuration files in sites-available that you have enabled. Apache only reads the files in this directory.
This structure makes it easy to manage multiple websites. You create a configuration file for a new website in sites-available, then enable it by creating a symbolic link to sites-enabled.
Configuring Virtual Hosts (if hosting multiple websites)
If you want to run multiple websites on the same VPS, use Virtual Hosts.
Create a new directory:
sudo mkdir -p /var/www/example.com/public_htmlAssign directory permissions:
sudo chown -R $USER:$USER /var/www/example.com/public_htmlCreate the configuration file:
sudo nano /etc/apache2/sites-available/example.com.confSample content:
<VirtualHost *:80> ServerAdmin [email protected] ServerName example.com ServerAlias www.example.com DocumentRoot /var/www/example.com/public_html ErrorLog ${APACHE_LOG_DIR}/error.log CustomLog ${APACHE_LOG_DIR}/access.log combined</VirtualHost>Enable the Virtual Host:
sudo a2ensite example.com.confsudo systemctl reload apache2Upload Your Website Content
Finally, you need to place your website files into the Document Root directory you configured earlier (/var/www/your_domain/html). You can use tools like SFTP (e.g., FileZilla) to connect to the VPS and drag-and-drop files easily.
To test, you can create a simple HTML file directly from the terminal:
sudo nano /var/www/your_domain/html/index.htmlAdd the following content:
<!DOCTYPE html><html><head> <title>Hello World!</title></head><body> <h1>Welcome to my website!</h1></body></html>After saving the file, open your browser and visit your domain your_domain.com.
If you see the message “Welcome to my website!”, you’ve completed all the steps and Apache is now serving your content successfully!
Now you know how to install Apache on Ubuntu 22.04 VPS. This is the first step to turning your VPS into a powerful and flexible web server. From here, you can install additional components like PHP, MySQL, and deploy dynamic websites such as WordPress, Laravel, or even build your own using your preferred programming language. If you encounter any difficulties during the process, don’t hesitate to visit VPSWindows to explore more helpful articles!