


Install Nginx on Ubuntu 22.04 to set up a powerful, high-performance web server for your applications. Nginx is widely known for its speed, security, and scalability, making it an excellent choice for hosting websites, acting as a reverse proxy, and load balancing. If you’re running an Ubuntu 22.04 server, installing Nginx is a crucial step in creating a reliable web hosting environment. In this guide, we’ll walk you through the entire process of installing and configuring Nginx on Ubuntu 22.04.
What is Nginx used for?
What is Nginx’s main use?
Why choose Nginx for your server?
Before diving into the installation process, let’s explore why Nginx is a preferred choice:
- High Performance: Nginx handles multiple connections efficiently, making it ideal for high-traffic websites.
- Reverse Proxy & Load Balancing: It can distribute traffic evenly among multiple backend servers, improving reliability.
- Security Features: Built-in security mechanisms help protect against common threats like DDoS attacks.
- Resource Efficiency: Uses an asynchronous event-driven model, consuming less CPU and memory compared to other web servers.
Prerequisites
Before you install Nginx on Ubuntu 22.04, ensure the following:
- A VPS or dedicated server running Ubuntu 22.04.
- A user account with sudo privileges.
- A stable internet connection.
Introduction to VPS Ubuntu 22.04
Key features of VPS Ubuntu 22.04
- Ubuntu 22.04 receives regular security updates, ensuring protection against vulnerabilities.
- The LTS version is supported for 5 years, allowing users to operate their servers without frequent upgrades.
- VPS Ubuntu 22.04 often comes with pre-configured images, making server setup quick and easy.
- Utilizing the APT package management system, users can easily install and manage software.

Common use cases
- Web Servers: Running Nginx, Apache, or other web servers.
- Databases: Hosting MySQL, PostgreSQL, or MongoDB.
- Application Servers: Deploying applications built with Node.js, Python, Ruby, etc.
- Development Environments: Setting up development servers for programmers.
Where to Buy VPS Ubuntu 22.04?
Step 1: Update your system
It’s always a good practice to update your system before installing new software. Run the following command:
sudo apt update && sudo apt upgrade -y
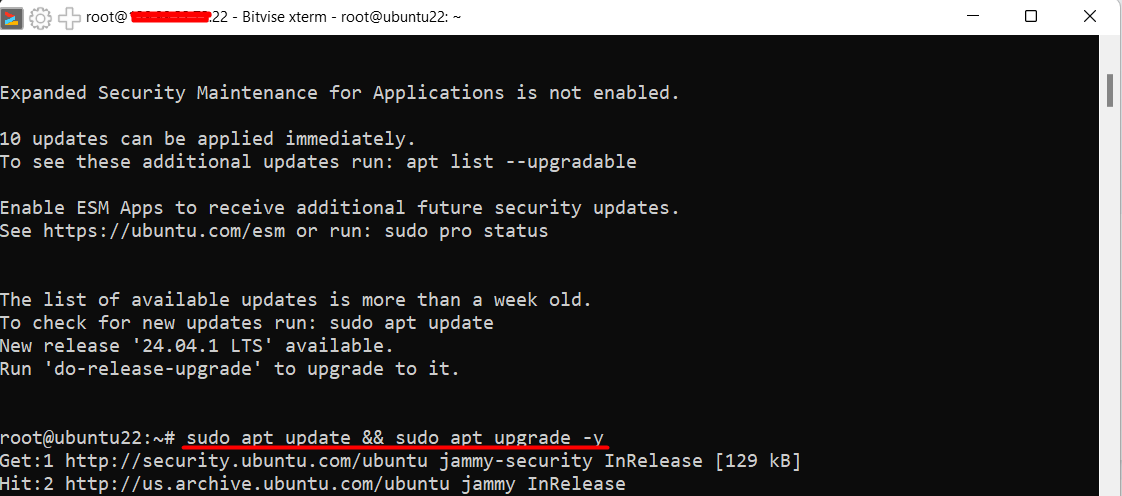
This ensures your package list is up-to-date and that your system is running the latest security patches.
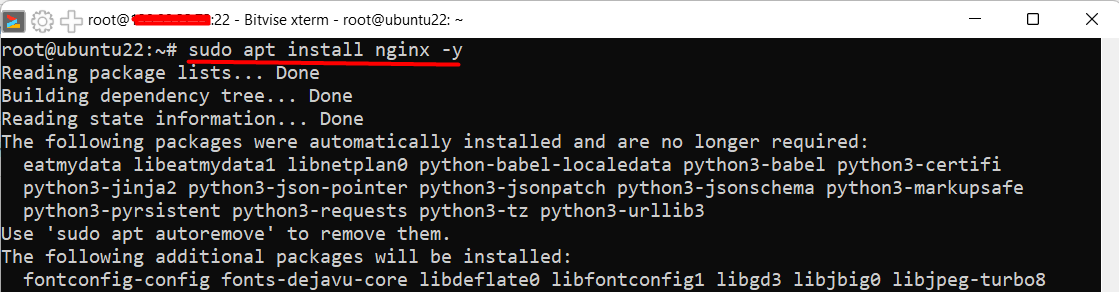
Step 2: Install Nginx
To install Nginx, simply run:
sudo apt install nginx -y
Once the installation is complete, you can verify that Nginx is installed by checking its version:
You should see an output similar to:

Step 3: Start and Enable Nginx
By default, Nginx should start automatically after installation. However, to manually start, stop, or restart the service, use the following commands:
The enable command ensures that Nginx starts automatically on system boot.
Step 4: Allow Nginx Through the Firewall
If UFW (Uncomplicated Firewall) is active on your Ubuntu server, you need to allow Nginx traffic:
- Check available application profiles for Nginx:
sudo ufw app list
You will see output similar to this:

- Allow HTTP and HTTPS traffic:
sudo ufw allow 'Nginx Full'
- Verify the firewall status:
sudo ufw status
If UFW is running, you should see something like:
Step 5: Verify Nginx Installation
To confirm that Nginx is running correctly, open your web browser and enter your server’s IP address:
http://your-server-ip
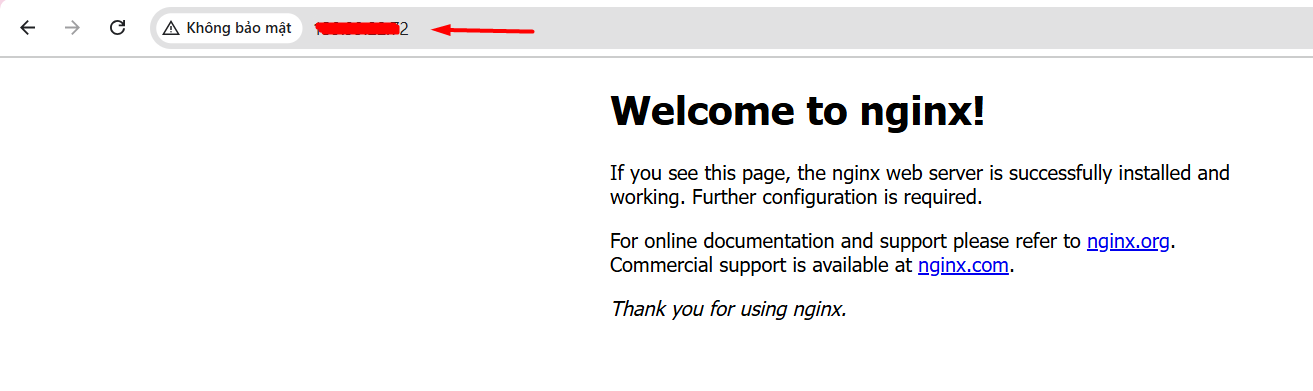
If Nginx is working, you should see the default Nginx welcome page.
If you see the display as shown in the image, it means you have successfully installed Nginx and enabled HTTP traffic for your web server.
VPS Ubuntu 20.04 is an ideal choice for developers, small businesses, and users who need a powerful and flexible server. Installing Nginx on VPS Ubuntu 20.04 is quite simple. With the detailed instructions above, we hope you can install Nginx successfully. If you encounter any issues, feel free to contact VPSWindows.com for support.
Thank you for reading this guide! Stay tuned for our upcoming tutorials on configuring Nginx and exploring more topics to enhance your server management skills. Follow us for the latest updates and expert tips!